Saturday, August 20, 2011

Birthday Card for Granny


This weekend my husband's grandmother is having a birthday. I made her a card that doubles as a mini album. I used one of my favorite mediums, a cereal box. It's very simple. I just cut two 10 by 5 rectangles from the box and fold each in half. Then, I set them up at a zig zag and stapled them together.


After that I just added paper, mats, photos, and embellishments that I cut from scrapbooking paper. I inked the mats and paper with blue ink to match my "cool pool" color scheme.


My favorite thing about this card/album is that either side when closed can be seen as the front. So you are looking at the beginning no matter which way its turned.


The pictures were taken a week ago at this same grandmother's pool. So she not only gets a cute birthday card, but memories from the time she got to spend with her great grandson's this summer!


Saturday, August 6, 2011

Bored!

The boys were bored today, so the oldest decided we should do some scrapbooking. They are very artistic little guys and enjoy glue and scissors, so I said, "What the hay?!"

I pulled out a box of TBS photos (To Be Scrapped) and let them pick ones they wanted to use. I figured if I hadn't used them by now what harm could it do.

The oldest choose a night that Daddy cooked pizza from scratch.

Daddy made pizza!

The middle man chose pictures from the time he and I attended free day at the Taekwondo school.

Zoom! (No idea what inspired that title)

The perfectionist in me wanted to go back over their pages and add journaling, captions, etc. but they seemed so pleased with their work that I decided not to be so type A.

Guitar Hero layout using Glitz paper and stickers from the Paper Studio


I made a page about a night of Guitar Hero at my sister's house. There is no better time to be had for so cheap! (Say that ten times fast) It was a good idea to get the creative juices flowing and a way to cure some blogger's block...and we're back!

Wednesday, June 29, 2011

Batman!

Ever need to be doing something, but aren't inspired to so you do some other thing? That's me tonight. Here is the digital layout I created in Picasa a minute ago.

Digital scrapbook page about a local Batman impersonator

I used the mosaic feature to get the blocked photos.  Since I only used four photos, it left the nice space to the left for journaling. Had I used more photos, the program would have filled in the page completely. I had to re-crop some of the pictures after "mosaicing" them because they didn't show the right pieces of the photos for the smaller ones. I am pretty sure that doesn't make since to anyone but me. I am open to any and all questions on how to do it though. It was really simple. Does anyone have a favorite company they print with?

Tuesday, June 28, 2011

Weekend Warriors Roar!!!

Well maybe not roar, but at least a little growl. This weekend I refinished an old dresser.  I painted it black because I like black furniture and it happened to be the color I had laying around. Here is a before picture.

Before: Sad Brown Dresser
This dresser was in my sister-in-law's back room, on the way to a garage sale or Craigslist. I very lightly sanded it and added three coats of chalkboard paint. Again, I was just using what we had under the kitchen cabinet.
After: Sexy Black Dresser
I could have changed out the hardware like in the dresser I did before, but I thought this made it look old and like it's supposed to look this way. So I am keeping it like this. I could have swept up the scraps of paper off the floor before taking the picture, but then I wouldn't have been able to work the topic of scrapbooking into this post.

Monday, May 9, 2011

Accordion Mother's Day Card

Front of accordion card which measures 4 x 6


I hope everyone had a great Mother's Day. Today I am posting the card I made for my mom. It is an accordion card that is 4 x 6 when folded and 4 x 24 when opened completely. To make this card I used only one sheet of 12 x 12 card stock and paper from my scraps drawer to embellish it.

Card expands to 4 x 24


First, I cut a speckled white sheet of card stock into three 4 x 12 strips. I folded each in half and assembled them alternating their directions in a zig zag pattern to create the accordion book look. You can make more or less "pages"  by using less or adding more 4 x 12 strips. Using three strips will yield eight pages or six pages, a cover, and a back.


Next, I printed and cut out five pictures and adhered them to the book. I left a page open for a sentiment. If I had been thinking, I probably would have written my sentiment on the back page because I didn't want my writing to bleed onto the face of my first picture.

I cut out the edges leftover from flower cut outs to use to embellish the front of the pocket


To remedy this, I put my message in a pocket that the reader can simply push to the right to read the message inside. If you trust your markers, or use one's that are photo safe and allow your sentiment to dry before folding, you should be okay. I used my purple Zig marker which should be photo safe, but just in case...

Sentiment tag in pocket to prevent ink bleed on the adjacent photo (fancy word points!)


I like how it turned out and the pocket adds extra detail anyway so no big deal. Since my mother has five grand kids I went ahead and added the two that aren't mine on the back. It worked out well.  I decorated the back of the card in the same flower motif as the front. Not a bad project and it took less than an hour. Only the best for my mom :-)


Back side of card opened completely

Sunday, May 8, 2011

Happy Mother's Day!

I made this in Picasa and had it printed at Walgreens with their free collage promotion.

Happy Mother's Day to all the moms out there making life happen for those around you!

Monday, May 2, 2011

Create your own digital stamp


For day five of the Tim Times Ten Grand Give-A-Way Challenge, I created this tag card to send as a thank you card to new pal. When I saw the example card, I thought mushrooms. Not sure why, but I went with it. I don't have a lot of stamps so I made a "digital stamp" by cruising the internet for some free clipart.


Once I found a graphic that I liked I saved it to my desktop. Then I did a little photo editing to remove the color. Next, all I had to do was print the image onto my paper and color it in with my scrapbooking markers.


Special thanks to Pam's Clipart for use of the image! And yes the sentiment is corny, but I couldn't help myself :-)

Sunday, May 1, 2011

In bloom


 We have definitely had our share of April showers lately. Here's to many May flowers. This is my submission for day four of Tim Times Ten Give-A-Way Challenge
This is an accordian tag using one 6 by 12 sheet of card stock. I cut out the word "bloom" with my Circut Machine and went over the edges with blue ink. Happy Spring!


Friday, April 29, 2011

Queen Bee


This is my submission for Day Two of the Tim Times Ten Give-A-Way Challenge. This was a challenge because I don't ever use the masking technique or much glitter. But I managed. We had to use a busy bee theme. What bee is busier than the queen?! I made up my own masking paint using some acrylic paint and water in a misting bottle I had laying around. My stencils were made on my Cricut machine using the Home Accents Cartridge. For a little glitz and glam, I used LuminArte! Two down, seven to go!

Thursday, April 28, 2011

Life is a highway


This is my entry in the Tim Times Ten Grand Give-A-Way Challenge. For day one, we were instructed to create a tag with a nostalgic theme. When I think of happy memories, road trips definitely make the top five list. The best trips I have been on were by car. One of my favorite childhood memories is a driving trip to Wyoming. Since we have had kids my husband and I don't take it to the road like we used to. But, we have taken the boys to the aquarium in Dallas and hope to drive to the beach this summer. I will be taking it on the road this weekend to the Beale Street Music Festival. I suppose my husband is giving me an early Mother's Day gift. On the road again, just can't wait to get on the road again...

Friday, April 15, 2011

Taking a crack at digital scrapbooking


I love paper so it already seems like I am being unfaithful, but every since I read this Clover Lane post on scrapbooking with Picasa, I have wanted to give it a try. So here is my first attempt. I took is slow. I didn't download any fancy digital papers or embellishments, but this was fun and didn't take that long.  Picasa is a free program you can download and use to do all sorts of photo editing, not just scrapbooking. (It is also how I made the banner on my blog after reading this Clover Lane post.)

I probably would have learned even more, but I am not one who really reads instructions. I just kind of skimmed them to get the gist of it. It wasn't hard and if you are the type who is imitated by PhotoShop, this might be the route for you.  The down side is that you have to get them printed somewhere, so you are not totally finished once you are done on the computer. I am doing my research to find out the best place to send them. Some people use sites that allow you to create the books and have them printed there all at once. Picasa seems better to me because there is no logging in. You just work on your pictures whenever and then upload them all at once when you are ready to have them printed. Another thing to consider is whether you will have them bound, or printed into single sheets to insert in a regular scrapbook. The possibilities are endless. There just may be a place for digi cropping, but it will never replace the good old fashioned glue and scissors.

Do you do digital scrapbooking? Why or why not?

Thursday, April 14, 2011

Get Well Mrs. Shute

Get Well Card made with Simply Sweet Cartridge
This week my oldest son's teacher was out sick. Hopefully a little card will brighten her day and speed her recovery.

Inside of Get Well card made with Simply Sweet Cartridge

Wednesday, April 13, 2011

Phew...

 
Here's another one of those posts that goes "instead of scrapbooking today I ..."


I ordered these bamboo shades from Overstock.com and Eric kindly installed them last week. One problem. Either they didn't come with the string strung, or he made sure they all fell out as he was putting them up. I spent the day looking at tutorials online until I found one that made sense and was able to string them myself. Success! I got the idea for doing this shade curtain combo from my favorite DIY blog Young House Love.

I enjoy decorating (meaning reading blogs about decorating), as much as I enjoy scrapbooking. They are one in the same really. The room is your paper, the furniture are your photos, wall color and accessories are your embellishments. 

What do you like to do that is not scrapbooking but just as cool?

Saturday, April 9, 2011

Butter


The remains of the cake I baked my grandmother, for her 70th birthday
"You gotta use real butter, y'all," I said in my Paula Dean voice.

Friday, April 8, 2011

How to make an Easter accordion decoration


Here is an easy and inexpensive way to make a festive Easter decoration. All you need are:
  • 2 sheets of 12x12 cardstock, 
  • a stapler, 
  • an Easter shape (measuring 7 inches or so), 
  • double sided tape, 
  • a hole punch,
  • and string for hanging.
 
Step 1: Take a piece of card stock and fold it over one inch. Repeat your fold backwards and forward until you have folded the entire piece of paper. Fold your accordion paper in half so that it looks like a fan. Repeat on the second piece of cardstock.


Step 2:  Carefully staple each fan closed. I used on staple near the center of the fold and one close to the top. Then spread your fan open and staple the two fans together so that they create a circle.


Step 3: Using doubled sided tape, attach your shape to the front of your accordion circle. Punch a hole in the top of your circle Attach your string to the top of the circle. Voila!


These decorations can be made to match any theme, for any occasion (birthday parties, baby showers, etc.) You can hang them from the ceiling, or attach to a wall or door. Enjoy!

Monday, April 4, 2011

A cardboard cowboy

My little cowboy. I couldn't find my brown cardstock
so he's sort of cardboard toned. :-)

Last week my friend and I were playing with the Cricut machine. We had so much fun making paper dolls. I am supposed to laminate them for a dress up velcro book, but I probably won't get around to that. It was super fun though. Becky finished one book and started another. Though I hadn't technically finished anything, I contributed to the finishing of two projects. Success!

My hero! Don't you love his hairdo? :-)

Tuesday, March 22, 2011

Picture taking tips???

Picture taken by my husband with his I Phone. Maybe that is what I need?

I am finding the biggest challenge to being a blogger is getting great photos. Even though I am a scrapbooker, 90% of the pictures I crop, I didn't take. I have a personal photographer (slash husband). I can't even find the battery charger to my camera right now, so as much as I want to show off my new projects I can't because I have no pictures of them. When I do know where the camera is and all of its parts, I am challenged by finding the right lighting, distance, etc. Of course I go to other blogs and they have excellent pictures. It makes me think I need a new hobby. Anybody got in picture taking tips and suggestions?

Saturday, March 19, 2011

Mad about paper blog hop!

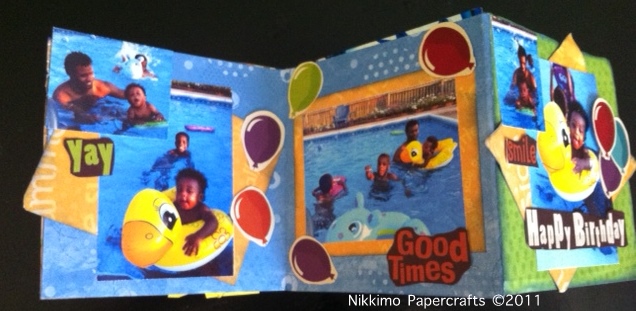
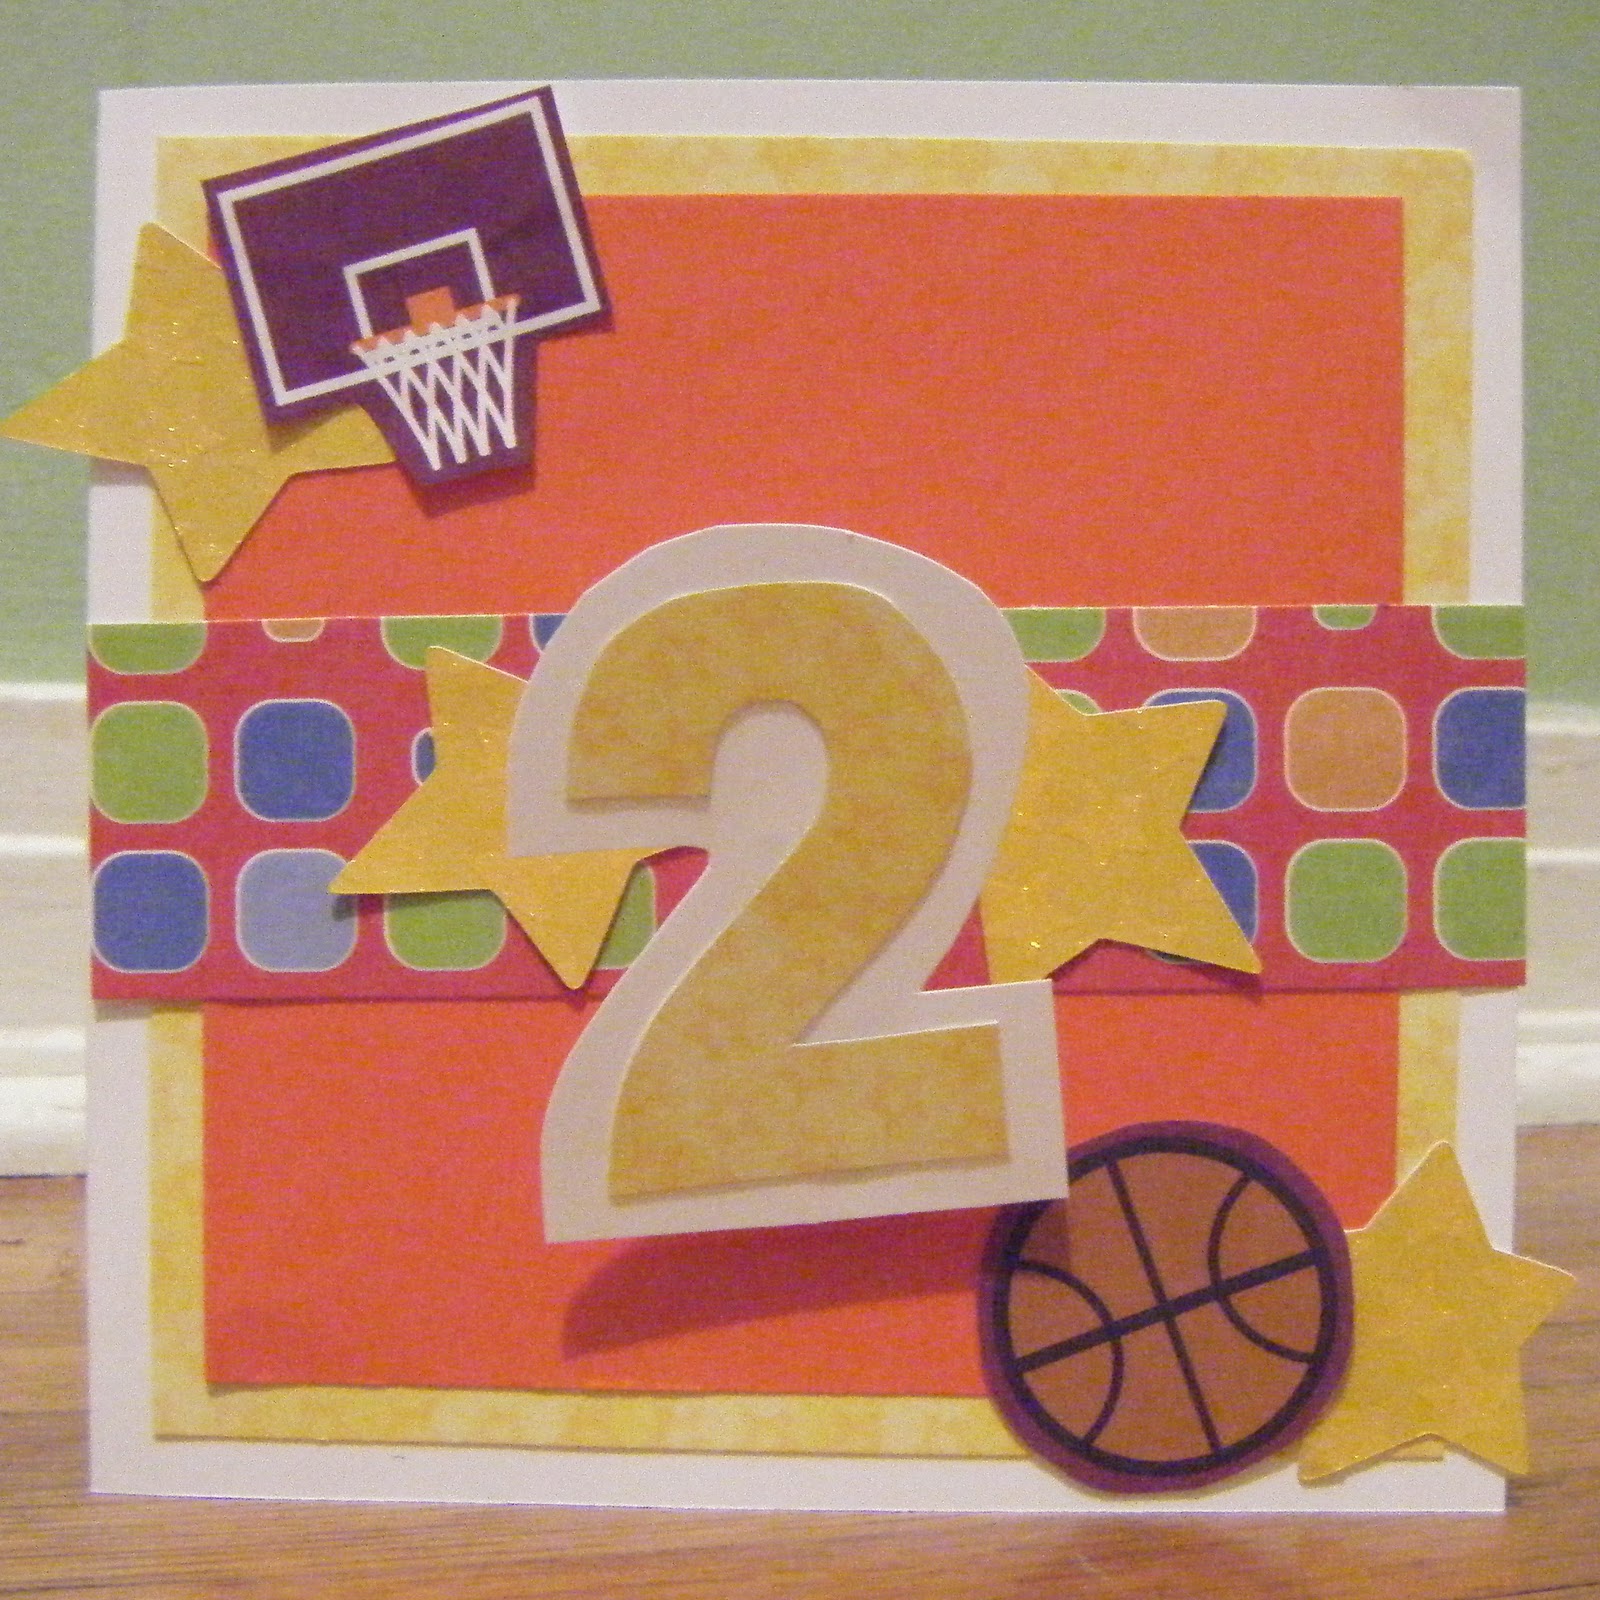
6x6 Birthday Card for a 2 year old all star!

Welcome to the Stampin' Dymonz Scrap Shack's Mad About Paper Blog Hop! Our theme for this hop, besides being Mad About Paper, is Sports -- it is March Madness for the Scrap Shack as well as for basketball after all!!. Some of the divas have creations with a sports theme. Some of them have simply created out of their favorite medium - paper! This hop shows our madness for all things paper! The hop starts at Stampin' Dymonz's blog, which can be found by going to www.StampinDymonz.com. It ends with Nikki's blog, found at nikkimopapercrafts.blogspot.com. Along the way we have Lynetta, Cynta, Jessica, JoAnn, Christina, and Tammy who have beautiful creations to share as well. Don't miss out! If you got to this blog hop from any place other than the beginning, go back to the beginning and work your way through. There's lots of inspiration to share and these divas have created some magnificent projects! Don't forget -- this is a two-day blog hop! Creations will be posted both Saturday, March 19th and Sunday, March 20th. Stop back by both days in order to see all of the beautiful work -- you too will be Mad About Paper!
 
For my first project, I made a super star card for my all star nephew who is turning two! The card is 6 x 6. To add a little fun and movement to the card, I accordion folded a small piece of cardstock and glued it to the 2 before affixing it to the card. It adds a slight pop up effect.

I hope you enjoyed my project and the Stampin' Dymonz Scrap Shack's Mad About Paper Blog Hop! Be sure to check back tomorrow starting again with Stampin' Dymonz for more paper fun!

Stampin' Dymonz (www.StampinDymonz.com)
Lynetta (CraftyNetta) (craftcreationsbynetta.blogspot.com)
Cynta (cynta.blogspot.com)
Jessica (customcreationsbyjessica.blogspot.com)
JoAnn (thecreatorsworkshop.blogspot.com)
Christina (cg-says.blogspot.com)
Tammy (fromme2upapercrafting.blogspot.com)
NikkiP (nikkimopapercrafts.blogspot.com) <---You are HERE

Wednesday, March 9, 2011

Firewood anyone?

This is definitely one for the scapbook when I get chance. Picture it, a quiet Saturday morning. Mom is away at a weekend gig. Dad is home puttering around on the computer, while the boys play in their room. Suddenly there is a scattering noise on the roof and then a great thud. Is it another earthquake? Rooftop squirrel gang violence? Nope. It is not one but two of my neighbor's 50 foot trees.


When I got home that afternoon, it looked like Armageddon house. Never a dull moment around these parts. Now we have a front yard full of chopped up tree parts. Let me know if you need firewood.

Tuesday, March 1, 2011

Baby wall hanging


What have I been up to? I am preparing for teaching another workshop! This will be my second time working with the lovely youth ladies of the Teen MOPS program at Mosaic Church. This week we will be creating the baby wall hanging I have pictured here.


I used my newest little creation as the subject for this little number. I cut three 5x7 pieces of some cardboard I had laying around for the base of my project. Then all I needed were a couple sheets of coordinating paper (still using the Echo Park paper I got for Christmas), some stickers and a little ribbon. This is cute for your own little one's room, or to give as a shower gift.


I have seen a similar project like this that makes a height chart. I am definitely going to try that one, just as soon as I find out the color scheme of my prego buddy's nursery. Something about springtime and babies that just go hand and hand.